

Publish your app to the web
- Start the Preview at least once, so Wonder can see how your app runs. See Preview your running app.
- Click Publish in the Preview’s title bar. The Publish to the web panel opens.
- Check Environment variables (see Choose the environment variables it uses).
- Click Publish.
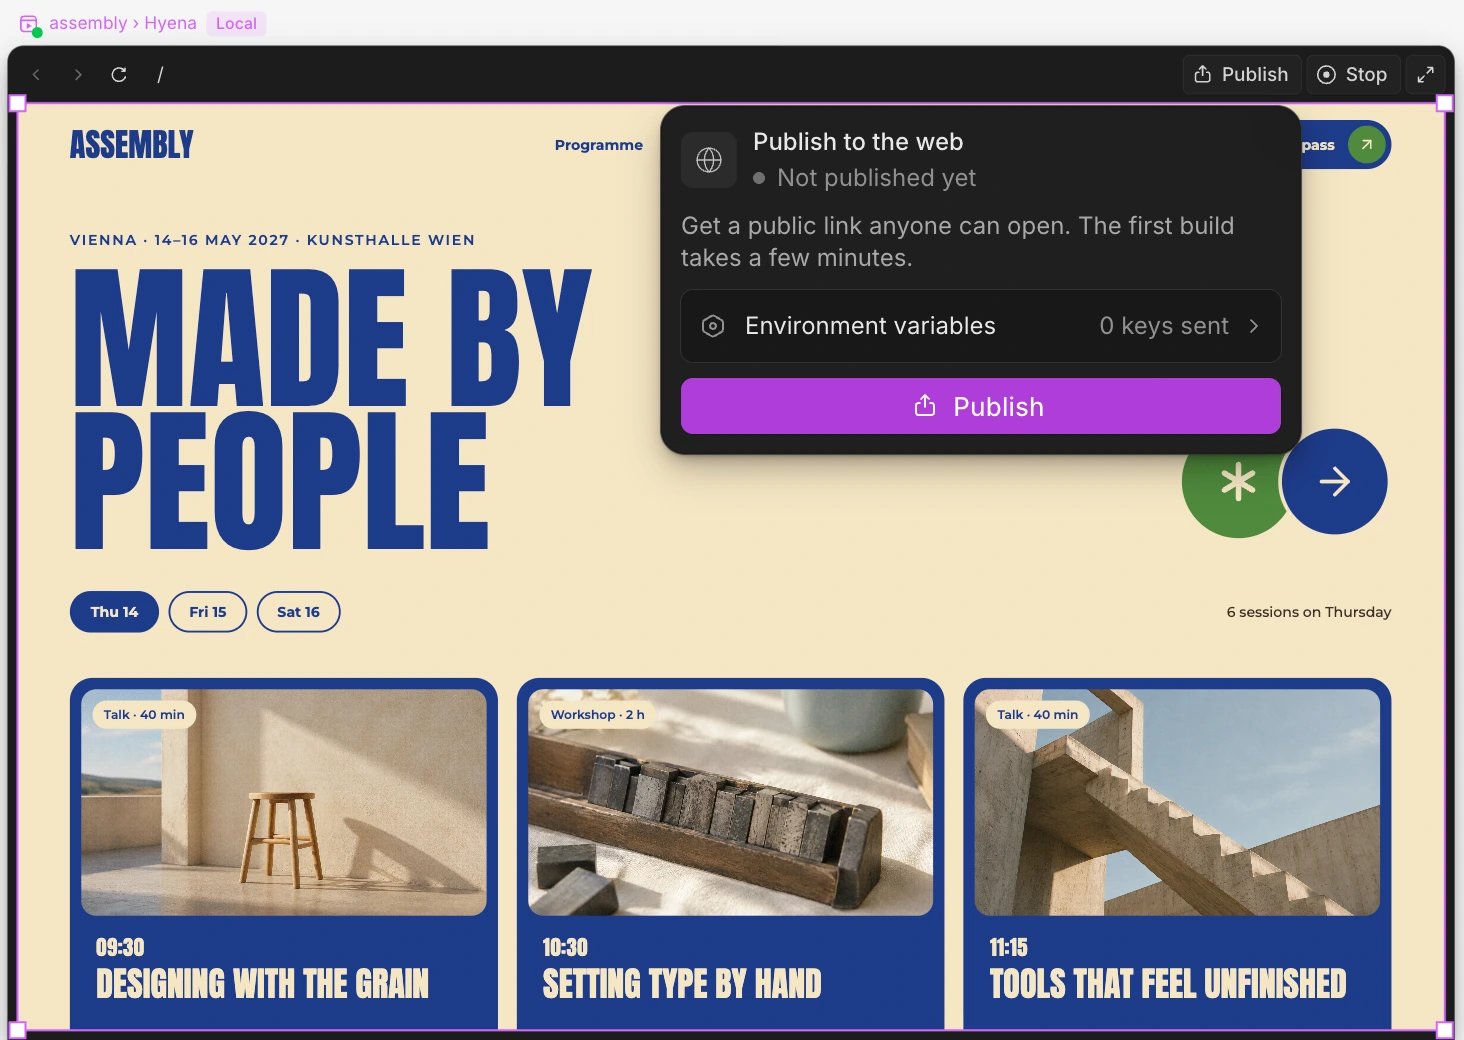
https://<random letters and numbers>.preview.wonder.design. It never shows your workspace, repository or branch name, and search engines are asked not to index it. Copy it with the copy button next to the link.
Your published app also appears on the canvas, next to your Preview, as a second Preview named after the worktree with (published) at the end. Everyone with access to the file can see it there.
Free plan: the panel says Share your app and Publish carries a Pro badge. Clicking it opens Share your app to upgrade. Someone who can’t change the plan sees a note to ask the workspace owner. See pricing.
What gets uploaded
Wonder uploads your worktree’s files as they are on your computer, including changes you haven’t committed, and builds them the way your project builds for production, such asnpm run build.
It leaves out:
- files your
.gitignoreleaves out (unless they’re committed) or your.vercelignoreleaves out; .git,node_modulesand other dependency, cache and build folders;- every
.envfile,.npmrc, keys, certificates and other credential files.
.env files are never uploaded as files. Only the environment variables you choose are sent with the build.
A publish can be up to 3 GB and 100,000 files, not counting node_modules and what your .gitignore leaves out.
Choose the environment variables it uses
Wonder publishes your app with the environment variables your Preview runs with. Click Environment variables in the panel (it shows how many keys are sent) to review them.- Tick the keys to send, or click Select all.
- Click Publish with these, or Back to publishing to return to the panel.
- Public: the key is compiled into the browser bundle, so anyone who opens the site can read it. This applies to names that start with
NEXT_PUBLIC_,VITE_,PUBLIC_,REACT_APP_,NUXT_PUBLIC_orEXPO_PUBLIC_. - Local address: the value points at your computer, such as
localhost, so it won’t work from the cloud. - Insecure address: the value uses
http://orws://, which the browser blocks on the publishedhttpssite. - New: the key is new since your last review.
.env file. If Wonder can’t see which variables your app runs with, it asks you to pick the .env files to publish with instead.
Update or unpublish your app
- Publish a new version. Click Publish again. The link stays the same and shows the new build when it’s live. If nothing has changed since the last publish, the panel says Up to date and the button is Publish anyway.
- Take it down. Click Unpublish at the bottom of the panel. The link stops working right away and the published Preview leaves the canvas. If you publish again later, you get a new link.
Open a published Preview
From the Publish to the web panel:- Go to published preview jumps to it on the canvas.
- Show published preview puts it back on the canvas if it was removed.
- The open-in-browser button next to the link opens it in your browser.
What a published app can’t do
A published app is a production build of your app at a public address, not the dev server on your computer. So:- Nothing on your computer is reachable. An API on
localhost, a local database or a VPN-only server won’t answer. Point your app at services on the internet. - WebSockets through the link don’t work, including ones your dev server proxies. Connect straight to a server on the internet instead.
- Server apps aren’t published. Static sites and JavaScript frameworks such as Next.js, Nuxt, Remix, Astro, SvelteKit and Vite apps work. Backend frameworks, such as Express, Hono, Nest, FastAPI, Flask and Django, and Python, Ruby, PHP, Java, Go and Rust apps are refused, with a message saying why.
- No hot reload. Each change needs a new publish.
- Sign-in needs the link allowed. If your sign-in provider only allows
localhostas a redirect, add the published link to its list once. The link stays the same for the life of the worktree. - Builds run on Linux, so an import whose upper and lower case don’t match the file name fails there.
- A build stops after 20 minutes.
When the link stops working
A published link stops working 7 days after both of these are true:- the workspace it was published from isn’t on a paid plan, and
- the person who published it isn’t an owner, admin or editor in any paid workspace.
If something goes wrong
- Your site wasn’t published. The first build failed. Click View logs to see the build output, Fix with agent to have your agent find and fix the cause (it runs the production build but doesn’t publish), then Try again. See Fix Preview problems.
- Start the preview first. Wonder needs to see your app running once to know its environment variables. Click Start the preview.
- The key list is out of date. Your start command changed. Restart the Preview so Wonder sees the keys the new command uses.
- This folder doesn’t use Git yet. Publishing needs Git. Set it up in the repository’s settings, then publish again.
- Someone else published this link. Only the person who published it can update it or take it down. Ask them.
- I don’t see Publish. Publish shows on a Preview you started, from a repository that uses Git, in the desktop app.