

Switch to Dev view
Dev view gives your chat the main column, with the side panel next to it: Changes on top and the terminal below. Drag the divider between them to resize.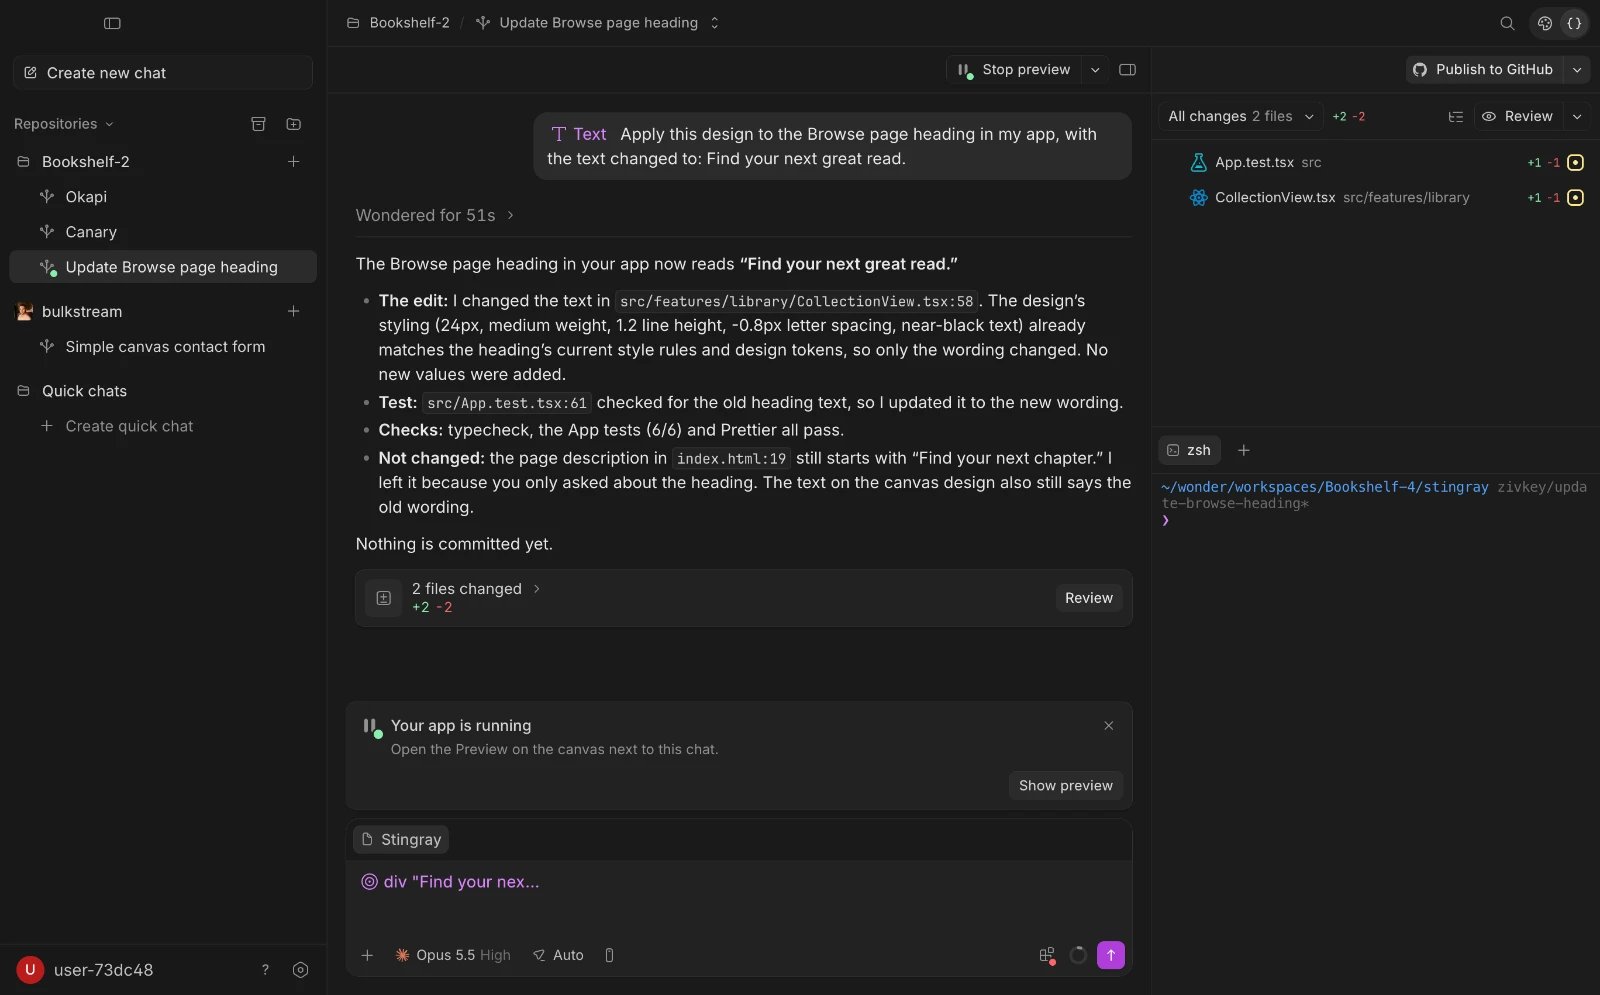
- Click Code (the curly brackets) on the switch at the top right of the window, or press ⌘ ⇧ ..
- To go back, click Design (the palette) on the same switch, or press ⌘ ⇧ . again. Your chat, files and terminals stay with the worktree.
Review your agent’s changes
The menu at the top of the panel picks what it lists:
Each changed file shows the lines added and removed and its status, such as Modified, New file or Deleted. Click Show as tree to group the files by folder.
- Click a file to open its diff in a tab beside your chat.
- Click Switch to split diff to see the old and new versions side by side, or Show unchanged lines to see the whole file.
- To hand the change back to your agent, click Add to chat in the tab, or right-click the file and choose Add changes to chat.
Discard changes
Hover a file or folder in the list and click Discard changes, or right-click it and choose Discard changes. Discarding throws away the uncommitted changes to that file. It can’t be undone. Wonder asks first when:- the file is new since the last commit, so discarding deletes it (Delete this file?);
- you discard a whole folder (Discard changes in this folder?);
- your agent is working in the worktree and may be editing the file.
Open and edit files
- Choose All files in the panel’s menu and click a file. It opens in a tab beside your chat.
- Edit it, then press ⌘ S or click Save. A dot on the tab means it has unsaved changes. Wonder doesn’t save files on its own.
- Select some lines and press ⌘ L to add them to your chat.
- A Markdown or SVG file opens as a preview. To edit it, click Show code or press ⌘ ⇧ V, and press it again for the preview.
- If you close a tab with unsaved changes, Wonder asks Save changes to ’…’? with Save, Don’t save and Cancel.
Open a file in your editor
Click Open in in the file’s tab, or right-click the file in the list. The menu lists Finder, Terminal and the editors Wonder finds on your Mac, such as Cursor, Visual Studio Code, Zed or Xcode. Copy path copies where the file is. The app you used last becomes the button’s default.Use the terminal
The terminal runs in the worktree’s folder, so its commands act on the same copy of your code as your agent.- Click + (New terminal) or press ⌘ T for another terminal. Switch between them with ⌃ Tab, and close one with ⌘ W. The panel always keeps at least one.
- Double-click a terminal’s tab, or right-click it and choose Rename, to name it. A tab shows the program running in it otherwise, with a green dot while it runs.
- Press ⌘ F to search the output and ⌘ K to clear it. ⌘-click a link to open it in your browser.
- Select some output and press ⌘ L, or right-click and choose Add selection to chat, to show it to your agent.
Let your agent run commands in the terminal
Your agent can run a command in one of the worktree’s terminals, so you see it run, and read what a terminal printed. There’s no switch for this: it follows the chat’s permission mode.- Before running a command, Wonder asks Run this command in the terminal? and shows the command and which tab it runs in. Only Full access runs it without asking.
- Before reading a tab your agent didn’t run anything in, Wonder asks Read this terminal tab?, since it may show your own commands.
Set up your shell
The terminal starts your own login shell, the one$SHELL names, such as zsh or bash. To use a different shell, change your login shell.
Settings > Agents > Terminal > Shell setup picks which startup files run in new terminals:
- Wonder’s defaults (the default): Wonder’s prompt, keys, history, completion and aliases, with your own startup files on top. Yours win where they differ.
- Only my own: just your own startup files.
PATH and marks prompts so your agent can tell where a command ends. The setting applies to terminals you open after changing it.
If something goes wrong
- “No uncommitted changes.” or “No changes on this branch yet.” Your agent hasn’t changed anything in this worktree, or its changes are committed. Choose All changes to see committed changes too.
- All changes can’t list the branch. The message says why, for example that the branch shares no history with its base or that no Git remote is chosen. Uncommitted still lists your changes.
- “Couldn’t read this worktree’s changes.” Try again. If it keeps failing, check that the worktree’s folder still exists.
- “This file is too large to open in a tab.” Open it in your editor with Open in.
- Wonder won’t open a file in your editor. Wonder doesn’t open worktrees that can hold code from a fork in apps that could run it. Use Finder instead.
- “Too many terminals are open”. Close a terminal in this worktree or another window, then click Retry.
- “Wonder can’t find this worktree’s folder”. Its drive isn’t connected, or the folder moved. Connect the drive or put the folder back, then try again.
- Your terminal is missing your prompt or aliases. Check Shell setup, then open a new terminal.