

Add a repository
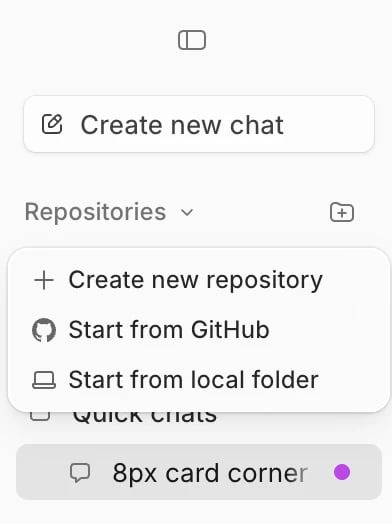
- In the sidebar, click Add repository (the folder with a plus) next to Repositories. If you have no repositories yet, click Add a repository….
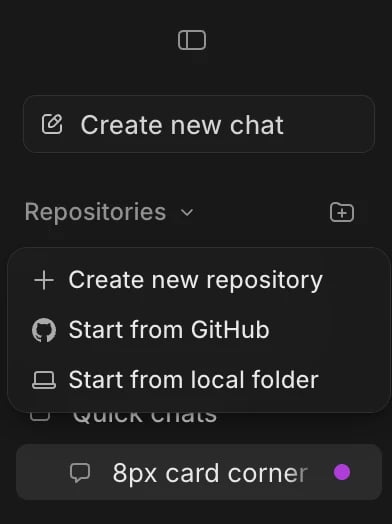
- Choose how to start:
- Create new repository: an empty repository. See Create a new repository.
- Start from GitHub: clone a repository you can access on GitHub. See Start from GitHub.
- Start from local folder: a folder already on your computer. See Start from a folder on your computer.
Start from GitHub
- Choose Start from GitHub. Connect a GitHub repository opens.
- If Wonder isn’t signed in to GitHub yet, click Continue with GitHub and sign in.
- Find the repository. The menu above the list starts on All accounts: your own account and the organizations you belong to. Repositories you’re a collaborator on are under Shared with me. Type in Search repos to narrow the list.
- Click the repository.
Start from a folder on your computer
- Choose Start from local folder.
- Pick the repository’s folder and click Open.
- Set up Git makes it a repository. Wonder saves the folder’s current files as the first commit and leaves out secrets, dependencies and build output.
- Skip, work without Git adds the folder as it is. Chats work in the folder itself, and you can’t make worktrees until you set up Git. You can do that later in the repository’s Repository settings.
Create a new repository
- Choose Create new repository.
- Type a Repository name. If the folder’s name will differ from what you typed, for example because of spaces, Wonder shows it under the field as Created as ….
- Click Create repository.
main branch in your Wonder folder. It’s only on your computer until you publish it: see Publish a repository to GitHub.
Turn a quick chat into a repository
A quick chat has no repository. When one turns into a project you want to keep:- Open the quick chat’s menu in the sidebar, or the menu at the top of the window, and choose Turn into a repository.
- Change the Repository name if you like. It starts from the chat’s title.
- Click Create repository.
Sign in to GitHub
Wonder uses your own GitHub CLI login, and never stores a GitHub token itself. If you’ve already signed in withgh in your terminal, Wonder uses that login, and signing in from Wonder signs in the GitHub CLI on your computer.
- Click Continue with GitHub, or Sign in to GitHub wherever Wonder offers it. Sign in to GitHub opens with a one-time code, and GitHub opens in your browser.
- Enter the code on that page and approve GitHub CLI. The window finishes on its own.
Switch GitHub accounts
- Choose Start from GitHub.
- Click Switch account next to Connected as, or choose Switch GitHub account at the bottom of the account menu.
- Pick an account, or click Add another account to sign in with a new one.
gh in your terminal switches too.
Where Wonder keeps your code
Your code stays on your computer, in your Wonder folder,~/wonder unless you change it:
To see a repository’s folder, open its menu in the sidebar and choose Show in Finder.
Change the Wonder folder
- Open Settings > Agents and find Wonder folder under Projects and worktrees.
- Click Change… and choose a folder. Use default goes back to
~/wonder.
Remove a repository
- Click ⋯ on the repository in the sidebar, or right-click it.
- Choose Remove repository and confirm.
If something goes wrong
- “Couldn’t clone this repository because Wonder isn’t signed in to GitHub, or its sign-in expired”. Click Sign in to GitHub on the repository’s row, then Try again.
- “That repository was not found”. Your GitHub account can’t see it. Check your access on GitHub, or switch to the account that has it.
- “No repositories yet”. The signed-in account has no repositories Wonder can list. Check which account it is, or click Switch GitHub account.
- “Your organization requires single sign-on for GitHub”. Sign in to GitHub again and authorize the organization.
- “Your organization blocks the GitHub CLI through its OAuth app policy”. Ask an organization owner to allow the GitHub CLI.
- “That sign-in code expired before GitHub confirmed it”. Start the sign-in again to get a new code.
- “This folder is too broad to become one repository”. You picked your home folder, a disk, Desktop, Documents, Downloads or a cloud-sync folder. Choose the repository’s own folder.
- “This folder has more than 10,000 files or 500 MB to commit”. Leave large folders out with a
.gitignore, or ask your agent to, then try again. - “This folder is already a repository”. Add it with Start from local folder instead of creating it.
- “The repository folder already has files in it”. Wonder never writes over them. Pick another name.
- “There isn’t enough free disk space to clone this repository”. Free up space, for example by deleting archived worktrees, then try again.