

How worktrees work
- Every new chat in a repository gets a new worktree, with a new branch, from your repository’s base branch.
- It gets its name from the chat. A new worktree starts with a placeholder name. Once your first message gives the chat a title, the worktree and its branch take that title. Branch names start with your Branch prefix (Settings > Agents > Projects and worktrees), or your GitHub username if you haven’t set one.
- Its folder is in your Wonder folder,
~/wonder/workspaces/, in a folder named after the repository. See Where Wonder keeps your code. - The worktree holds everything for that piece of work: its chats, terminals, Preview, design files and pull request.
Create a worktree
- In the sidebar, click + (New worktree) on the repository’s row. You can also open the repository’s menu (⋯) and choose New worktree.
- Type your first message and send it.
Run several agents at once
Start another worktree while an agent is still working in the first one. Each agent works in its own folder and on its own branch, so you can have one fixing a bug while another builds a feature, and open a pull request from each. To keep the worktrees you’re using at the top, open a worktree’s menu and choose Pin. Drag worktrees to reorder them, or select one and press ⌥ ↑ or ⌥ ↓.Create a worktree from a branch or pull request
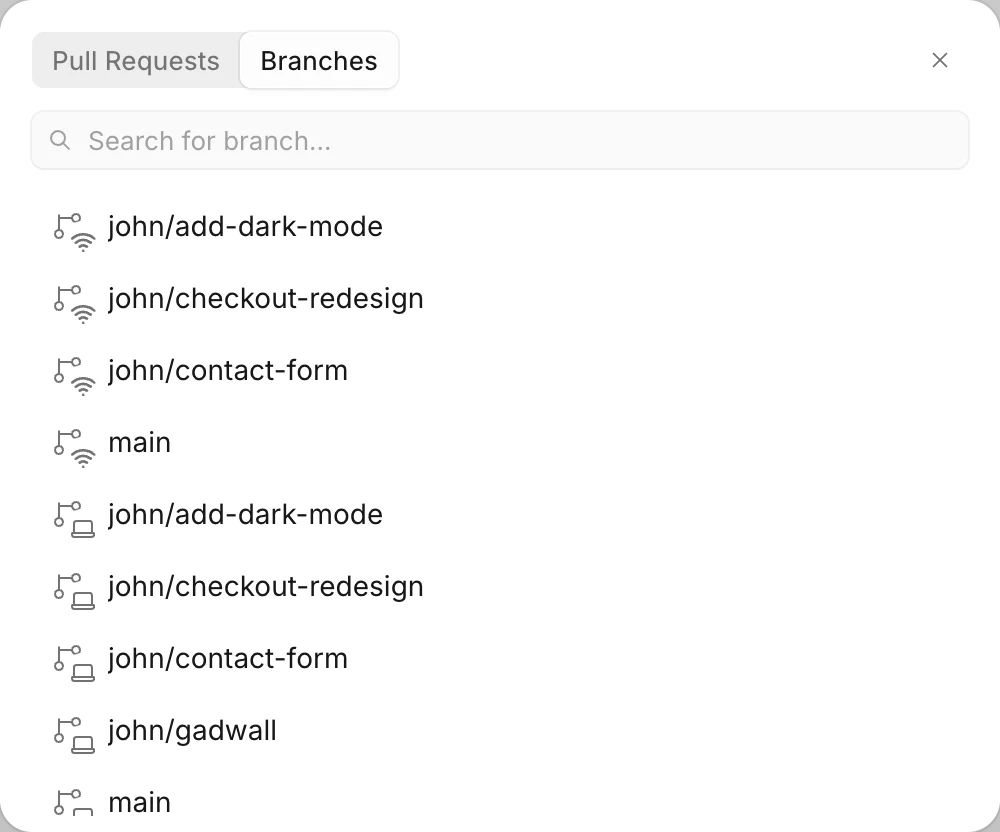
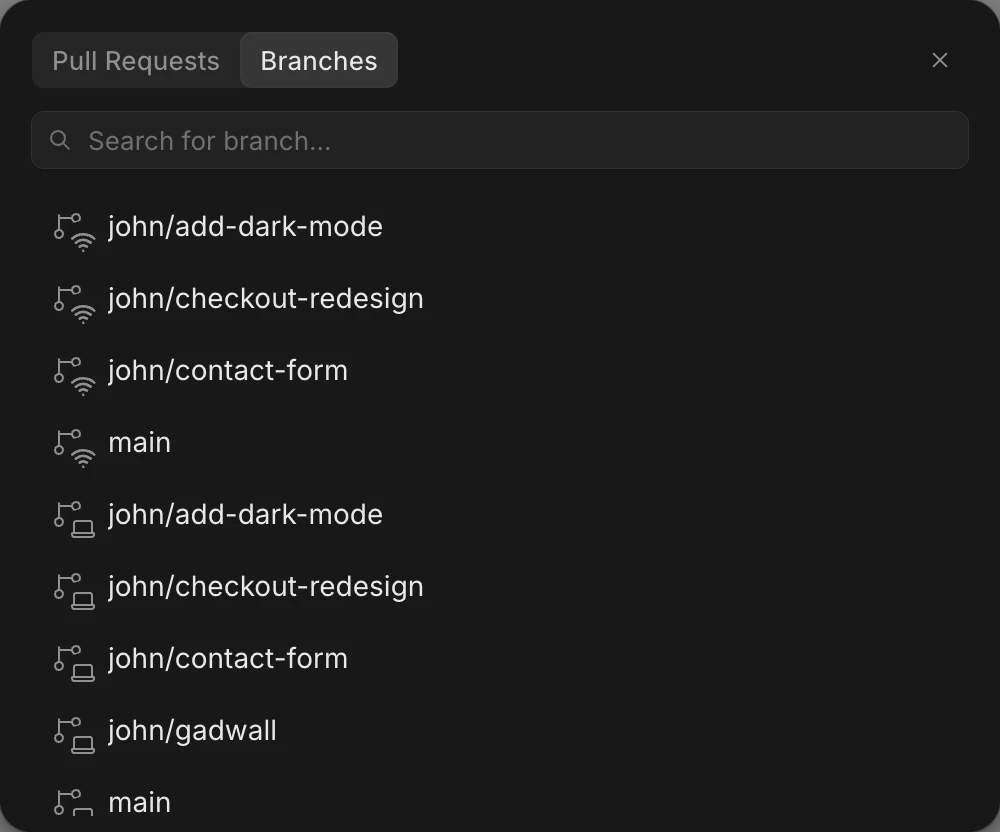
- Open the repository’s menu (⋯) in the sidebar and choose Create from.
- Choose Pull Requests or Branches, and type to search. Pull Requests lists open pull requests; type a number, such as
#42, to find a merged or closed one. - Click the pull request or branch.
Copy .env and other ignored files
A worktree is a fresh copy of your repository from Git, so it doesn’t have the files Git ignores, such as.env. List the ones your app needs, and Wonder copies them into each new worktree:
- Open the repository’s menu (⋯) in the sidebar and choose Repository settings, then Worktrees.
- Under Files to copy, add one path or glob per line, for example
.env,**/.env.localfor a file at any depth, orcerts/**for a folder. Or click Choose files… to pick them.
(, ) or ~ can’t be copied.
Under an entry Wonder can’t copy, such as a file Git doesn’t ignore, the settings say why, with Locate… and Remove. New worktrees aren’t created until you fix or remove that entry. An entry that matches nothing doesn’t stop them: new worktrees are created without it.
If you start the Preview in a worktree that’s missing a secret file, Wonder offers to copy it and adds it to Files to copy for you. See Your app needs a secret file.
Run a setup command in each new worktree
The Worktree setup command runs once in each new worktree, after Wonder copies your files and before its chat starts. Use it to link or copy local config or fix paths, for example with a script you commit to the repository.- Open Repository settings > Worktrees.
- Under Worktree setup command, type the command, such as
./scripts/setup-worktree.sh. Chain steps with&&. It saves as you type.
.env:
Repository settings are saved on this computer, not in the repository, so each person sets their own command.
To run it again in a worktree, open the worktree’s menu and choose Run setup command. It waits until the agent finishes.
If the command fails, Wonder keeps the worktree and says so. Click Show output to see what it printed.
This is different from the Preview’s Setup command, which installs what your app needs before the Preview starts it. See Set up the Preview.
Moving from Conductor?
If your repository has a Conductor setup or archive script, Repository settings > Worktrees offers Use Conductor’s setup script and Use Conductor’s archive script. Wonder doesn’t run them until you accept. See Move from Conductor.
If your repository has a Conductor setup or archive script, Repository settings > Worktrees offers Use Conductor’s setup script and Use Conductor’s archive script. Wonder doesn’t run them until you accept. See Move from Conductor.
Give a worktree its design files
A worktree can hold up to 50 Wonder files. Every chat in the worktree designs in them. While a worktree has none, its chat says This worktree has no canvas file attached yet. Click Create file for a new one, or Add file to pick one of yours. You can also:- Type
/add-filein the chat, or click + in the message box and choose Add file. - With a file open, click the suggestion to add it to this worktree. It joins when you send your message.
Open a worktree in Finder, a terminal or your editor
Open the worktree’s menu in the sidebar:- Show in Finder opens its folder.
- Open in terminal opens your terminal app in its folder.
Rename a worktree
Double-click the worktree in the sidebar, or open its menu and choose Rename. This changes the name Wonder shows, not its branch or folder.Archive and restore a worktree
Archive a worktree when you’re done with it, for example once its pull request merges:- Hover the worktree and click Archive worktree, or choose Archive worktree in its menu.
- After a merge, click Archive on the Ship button. See Merge and archive.
node_modules, to save space; the Preview runs its setup again after you restore the worktree.
To restore one:
- Click Archived in the sidebar’s Repositories header. It shows when something is archived.
- Find the worktree under Worktrees and click Restore.
Choose what happens when you archive
In Repository settings > Worktrees, under Archiving:Delete archived worktrees
In Archived, click the delete button on a worktree, or Delete all worktrees. Deleting removes its folder from your computer, and any uncommitted changes in it. Its branch and commits stay in the repository. When your disk is almost full, the sidebar shows Free up space, which deletes your archived worktrees.Work in the repository folder instead
You can let a chat work in your repository’s own folder, on whatever branch it’s on, without a worktree. Its changes land directly in that folder, so don’t run two agents there at once.- Turn on Show advanced repository controls in Settings > Agents > Projects and worktrees.
- Open the repository’s menu (⋯) and choose Work in the repository folder.
If something goes wrong
- “This branch is already checked out in the repository or another worktree”. Open that checkout instead, or click Create anyway to work on a copy of the branch in a new worktree.
- “Wonder can’t tell which branch new worktrees should start from”. Click Choose base branch and pick one in Start new worktrees from.
- “Couldn’t fetch the latest base branch”. Check your connection. If Wonder goes ahead anyway, it says the worktree starts from the base branch as this computer last fetched it.
- “The files to copy exceed 5 MB per file, or 20 MB or 200 files in total”. Copy fewer or smaller files in Files to copy.
- “The worktree setup command failed”. Click Show output to see why. The worktree is still there; fix the command and choose Run setup command.
- “The worktree setup command didn’t run, since this worktree or the files copied into it come from a place Wonder doesn’t trust”. The worktree holds a fork’s pull request. Check its code before you run anything from it.
- “This worktree has as many files as it can hold”. Remove a Wonder file from Works with to make room.
- “Another worktree has this worktree’s branch checked out now”. Switch that worktree to another branch, then restore this one.
- “Your disk is full”. Click Free up space in the sidebar, or delete archived worktrees in Archived.